Sunday, 21 February 2016
Repairing Redwing frames, ribs
Pintail has a few broken ribs and to repair them I decided to try this as with her deck on it would be impossible to feed a new steamed length of timber down behind the inwale and riser. There were four broken timbers that had failed at the point of greatest curvature and stress. There were two together on the port side in way of her chainplate that could not be ignored and a couple on the starboard side. New oak was cut to the Redwing scantling of 5/8" by 1/2" and long enough to overlap the break. These were steamed and clamped alongside the broken frames as shown. Now, I am not 'sistering' these frames - after a couple of weeks to dry out I drove out the fastenings of the lower part of the broken frames and cut a long scarf which was glued with Semparoc as we re-fastened, as shown. This is a bit of an experiment but it saves removing all the rib in an inaccessible part of the boat.
Saturday, 6 February 2016
Paint stripping
We managed to get one of the repaired sections of planking fastened in but winter progress has been slower than expected as I do not have regular help up at the shed and instead have been doing jobs that I can get on with alone.
One such job is to continue stripping off Nanw's old paint. I had deliberately left as much of her paint on as possible since it slows the rate at which the timber dries out with the boat out of the water. Now in the winter her salty timber is very damp again, even in the shed and I have been scraping it back. One of these modern decorator's scrapers with tungsten carbide blades is great for dry-scraping and I have also been using it on the Finesse yacht at Saundersfoot to strip her thick anti fouling. The bottom paint comes off OK but the top sides will need heat-gun or blow lamp.
Finally, I found that unless I clean and oil my plane, saws and chisels immediately after working on Nanw's timbers they quickly go rusty from contact with the salty old wood!
![]() |
Old paint gradually coming off |
Sunday, 10 January 2016
Pitch Pine
A slightly 'off-topic' post here. They are doing some 'improvements' to our local Baptist Chapel that have involved ripping out some of the pews. We found the 'carpenters' had dumped the timber pews in a skip outside - It is pitch pine and has graced this chapel since 1869.
Unsurprisingly I liberated this 'unobtainium' of the timber world and stowed the pews (now in kit form) in the boatshed. What surprised me is how dense and heavy this timber is... I know the lengths here are too short to be of much use for anything other than small joinery on my projects.
Some years ago I owned a lovely carvel built 26' launch built of pitch pine on rock elm timbers - she is over a hundred years old now and still survives at Evesham, I believe. Her hull planking was all full length i.e. no scarfs. I have heard this timber referred to as the 'Queen of softwoods'. The resin content gives it a resistance to decay that few timbers can match.
Sunday, 27 December 2015
Repairing bottom planking 2
Once scarfs had been cut on the ends of the undamaged planks a new length of timber was marked and shaped to suit. The lower edge of this run of plank (second strake from the keel) is almost ruler-straight and took very little working. Matching scarfs were marked and then planed on the bench. This was done a lot faster than cutting those in the boat. Lastly, the bevel of the land was transferred to the upper edge of the new plank and planed. Again, because this section is in the bottom of the boat there is only a tiny angle to the land. The scarfs on the boat were gently wedged open and the plank was slipped into place, ready for fastening. I then turned my attention to making new sections to replace the damaged strakes on the other side as I will have to borrow someone to help with the nailing again.
![]() |
New section of plank shaped and fitted, ready for fastening. |
Thursday, 19 November 2015
Repairing bottom planking 1
Now that the main upper structure of 
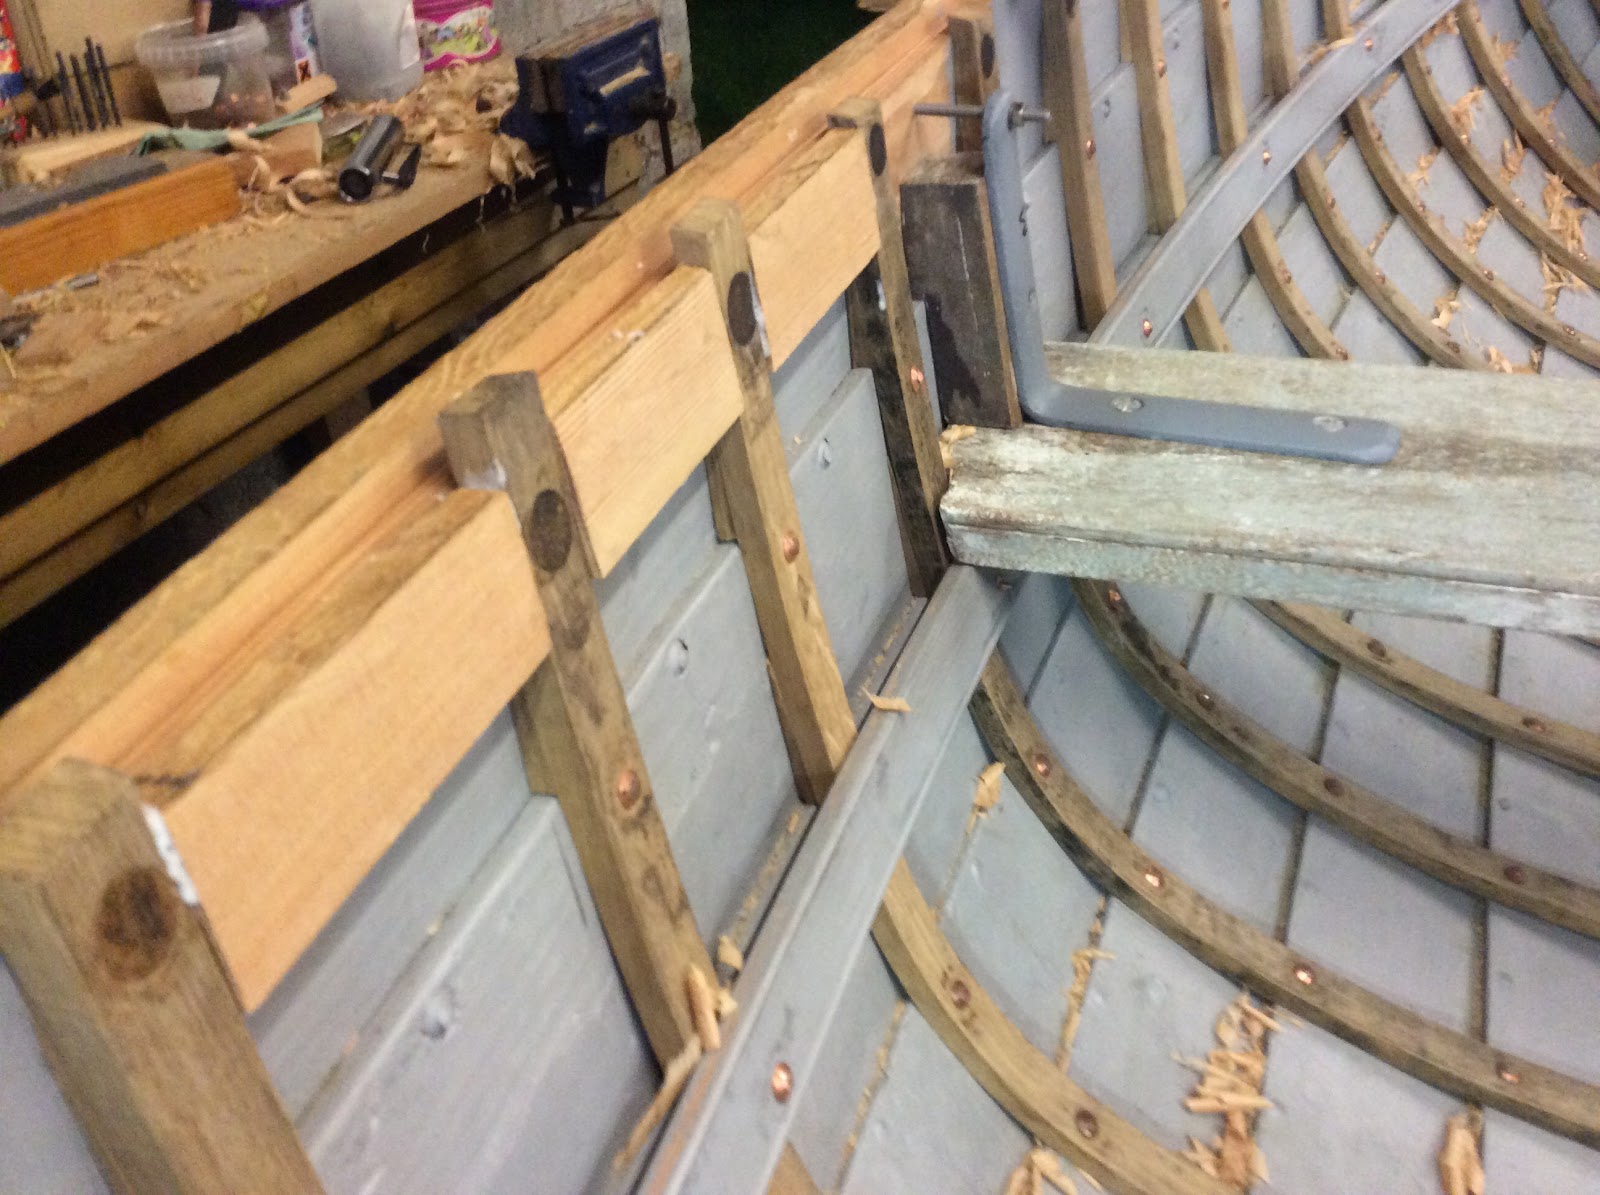
Nanw was complete i.e. Frames, stringers and inwale all fastened she was sufficiently stiff to be turned over and put on trestles - she is quite heavy and it took three of us to turn her over safely.
The bottom planking has two areas of damage: A split in the second plank port side for about 4ft amidships and some stoving in on the starboard side - probably caused by clumsy handling on a trailer. Now, professionals would probably insist on replacing all the strakes full length but as this is a 'low value' boat and timber and copper is expensive, I intend to adopt a method I have used successfully in the past and scarf a new section in to each plank, staggering the scarfs.
Firstly, all the remaining fastenings along both lands were cut and driven out to beyond the damaged section and a line marked across chosen to miss the frames. Then a line of small holes were drilled and the keyhole saw used to cut across the plank. A chisel chopped the timber in way of the lands, inside and out, and the section was teased out. Scarfs were marked for a length of 3" on each end of good plank (a ratio of about 7 times plank thickness). Cutting them is a time consuming business in the boat, mainly using a 1" chisel. A small wedge opens the land to allow the scarf to be cut under the land.
![]() |
Cutting across the plank. Sharp chisel used to cut out. |
![]() |
Section of plank removed - no going back now! |
![]() |
Cutting a scarf in-situ. A wedge is used to open the land. |
Saturday, 14 November 2015
Inwales fitted and fastened
The new inwales were cut from some close-grained Douglas Fir and had some gentle tapering to fit snugly behind the existing breasthook and quarter knees that had been left in place. A beading was planed on the lower edge of the timber as had been done on the stringer below it. The inside face of the timber was given a couple of coats of wood stain/preserver and then clamped firmly in place and fastened all round starting at the stem and working aft. Once fastened through all the timber heads the Jack Nichols was glued in place each side of the stem and the long copper nails through the breasthook, thwart knees and quarters were driven and fastened.
![]() |
Inwales being planed down to sheer level. |
![]() |
Quarter knee re-fastened clamping inwale. |
Friday, 2 October 2015
Fitting thwarts and preparing the inwale
After fitting and fastening new stringers the mid ships and forward thwarts were re-fitted and a new after thwart made from hardwood and given a beaded edge to match the other two. The thwart knees are basic bent angle brackets but neatly made and were galvanised. Ideally they should have been re-dipped but I gave them a good clean up and a few coats of 'galvafroid'. These were bolted back in after priming the timber edges using the original screws which are stainless M8 countersink - a clue that this little boat is not as old as she looks.
I intend to fit an inwale to the insides of the full-height timbers and this is a change to her original construction. In preparation for this I am fitting sections of timber between the ribs in way of the thwarts, the rowlock positions and at the vessel's ends.
![]() |
Thwart refitted and fastened - This is mid ships port side. |
![]() |
Short sections of timber glued between ribs to make a solid inwale. Here is port side mid ships rowlock position. |
Subscribe to:
Posts (Atom)