Work on the boat slowed somewhat during the lockdown as I was only able to visit the boat occasionally on my way home from work. My buddy, Pete, was unable to work with me. However I was able to clean down her bottom and get some primer on to slow her opening up as the weather became warm and dry in April.
 |
| Underwater primer going on |
 |
| A couple of coats of primer on the bottom |
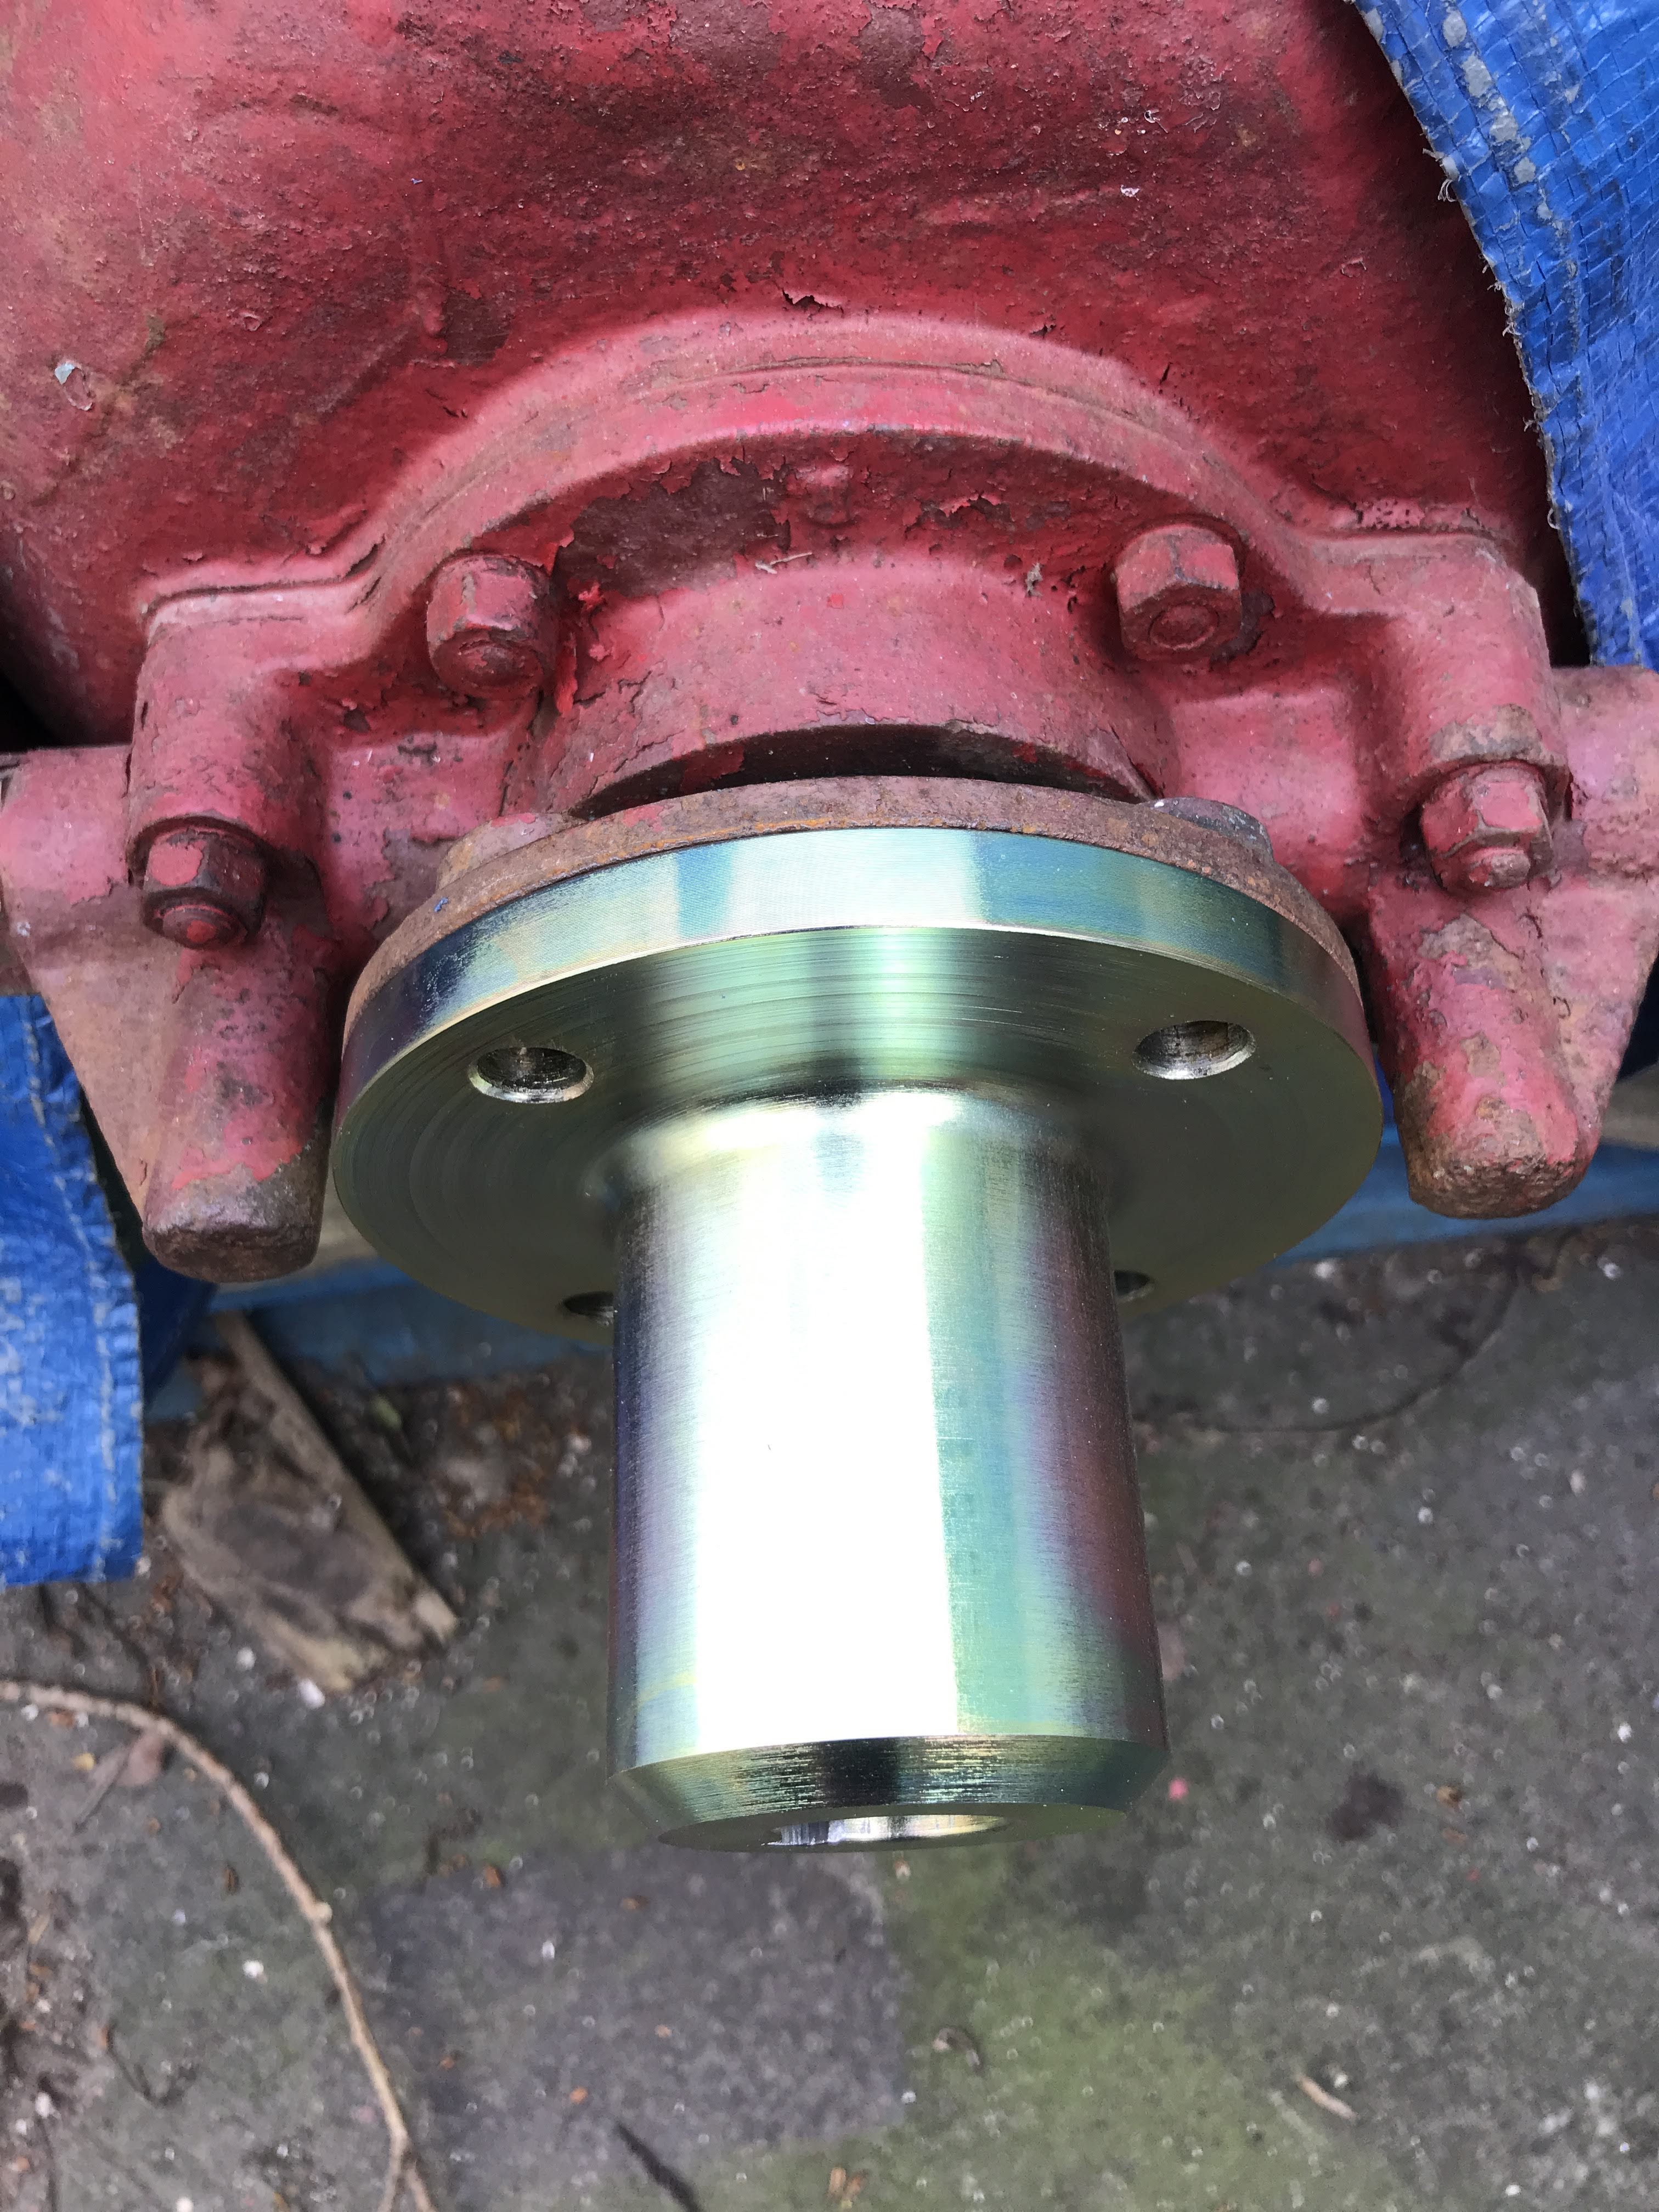
Another job I tackled was to find a coupling to fit the propeller shaft that would match the output flange of the Dorman's gearbox. Nothing was available off the shelf so I drew a dimensioned diagram of the coupling to suit the 12:1 shaft taper and keyway and had it made by a specialist. Not cheap but it is an excellent job. The Cutter has 1 1/8" diameter tail shaft which is a non-standard size these days and I was warned that if a new shaft was required it would have to be specially ground. Fortunately the shafting is in good condition with very little wear, straight and no damage.
 |
| Custom-made prop shaft coupling |
 |
| Perfect fit on gearbox... |
 |
| ...and shaft taper. |
Various small holes in the hull were plugged and repaired..
 |
| This was were the engine intake seacock had been moved to. All these holes were plugged and a tingle glued on the inboard side. |
 |
| Nasty holes and damage caused by a sacrificial anode mounting studs |
 |
| Holes cleaned out and iroko plugs glued in place - grain orientated in line with plank's. |
Fortunately the boat's original seacock had survived and it was carefully dismantled and cleaned. Its original location and part of a bronze adaptor plate still existed, although plugged and covered with a wooden tingle. This was removed and the fastening holes opened up again since I'm going to re-install the seacock in its original location as per the plans, since it will be adjacent to the engine's pump intake.
 |
| Seacock checked and cleaned - a lovely bronze fitting. |
 |
| Original seacock location |
 |
| Part of one of the mounting plates; holes line up exactly. |
 |
| Bilges under engine cleaned and primed |
 |
| Loose paint - lots of it - stripped in stern sheets |
 |
| ... and primer applied. |
 |
| Repaired frames primed |
 |
| Bilges given a coat of grey bilge paint. Orange glow caused by sunlight shining through the cover. |
The midships bulkhead was sealed and fastened into place and the thwart screwed down tight on top. The knees were then nailed and riveted - these used 6-gauge copper nails up to 6" long with 3/4" roves to suit.
 |
| Bulkhead finally fitted and fastened |
 |
| Knees being fastened |

 |
| Midships and forward thwarts fastened |
 |
| These stiffen the boat up considerably |
We were itching to have a 'play' with the engine - one of two that I have. The first is complete but the second has been partially dismantled - goodness knows why!?
It was over a year since the engine last ran so we removed the rocker cover, checked the tappet clearance and poured plenty of oil over the valve gear and cranked the engine over by hand. A fuel supply was rigged up, battery and starter button connected and after some bleeding of pump and injector lines she started and ran..
 |
| Checking valve gear |
 |
| Fuel and cooling water hooked-up |
 |
| It lives!! |
There are a few jobs to do to the engine before it can be installed: It needs a dynamo or alternator to be driven from the 'Vee' pulley on the side of the engine, speed control and linkage and a control panel to mount gauges and switches.
In the meantime we cleaned the engine, primed it with red-oxide and enamelled it in a more appropriate grey that may approximate the colour it originally wore in service.
 |
| Cleaned and de-greased |
 |
| Red oxide on |
 |
| Two coats of grey enamel... |
 |
| ..and black fitments. |
 |
| There are lots of parts on the Dorman that can be polished. |
Back to the Cutter we investigated the suspicious steel 'shoe' that encased the forward part of her keel. It was bursting with rust and so the remains of bolts were cut off and driven out and the thing was sliced and prised-off.
Underneath was a tidy piece of oak that had been slotted-in forward of the lifting plate and scarfed to match the original stem piece. The after scarf was too short and was obviously weak so we drove out the four heavy copper rivets holding the lifting plate to enable a long scarf to be cut.
 |
| Cutting away at the steel 'shoe'. |
 |
| Peeling it away |
 |
| Freeing the forward keel section |
 |
| Cutting the lifting plate fastenings |
 |
| ..and driving them out. |
No comments:
Post a Comment