Friday 21 July 2023

Re-commissioning a Shetland Isles fourareen 'Corianne'

We have been planning to do some more dinghy cruising and so after selling 'Nanw' the 15ft rowing boat I brought 'Corianne' out of storage and rigged her up and had a days test sail. She was a bit leaky but rapidly takes up after a few days wet. Her cotton sails still set quite well despite being over seventy years old.
Back home a few jobs were needed. Her old iron keel band was crumbling away and after removing all her gear with help I turned her over onto blocks and removed all the old rusty banding.


The exposed keel was cleaned and the old screw holes filled with glued-in timber plugs.


Bare timber given a coat of oxide primer like the rest of the boat's bottom.


I had a strip of stainless steel left over from the rowing boat restoration that was exactly the right length and this was offered up and a taper cut on the forward end. Holes were drilled for new fastening screws.


The strip was bedded on flexible builder's mastic and screwed down. The bottom paint was touched -up with as much red-oxide as I had left after a few bits of garboard seam putty were re-puttied. She was then turned back over.


Not photographed but I did some servicing work on her trailer :-  This is an old but well-made galvanised Snipe trailer of imperial dimensions. I had recently refurbished and rustproofed its transverse springs which give it a nice soft ride but now I added some extra keel and side rollers, fitted a new jockey wheel assembly with a pneumatic tyre and mounted two sets of rollers under the rear frame to help with hauling it under 'Corianne' when recovering from the beach. The wheel bearings were renewed and new wheel and tyre assemblies were fitted as the originals were now a bit too rusty and aged.  Lastly I made a new assembly to mount the lighting board to the trailer as it was originally intended. I converted the light board to 24V and fitted it with a NATO plug to suit the ex-military Land Rover used for towing.

Next task with her back on her trailer was to make a floorboard section to fill the after space which has always been open and where I normally dip the baling bucket. Here is the area with a piece of timber cut to support the new floor.


A cardboard template was made to fit the area and joggled round the frames.


The shape was transferred to some Douglas Fir and the boards planked-up.


Fir planks shaped and fitted


Linking battens glued and nailed in the same style as her existing floorboards.


Another job I did whilst waiting to go sailing again was to make a pair of 'galley boxes'. These were glued up out of 9mm marine ply lined with formica and stainless steel and made to fit in locations just behind the mast. The starboard box is made to suit a little spirit camping stove and tea-making kit and the port box is for victuals.


All varnished-up and with carry-handles. A one-gallon potable water container sits amidships.


Stove can be used in situ with the front hinged down.


A compass bracket has been fitted to each side of her centre thwart so it can be used as a steering compass underway.


Now we just need some better weather to go sailing again.

Friday 4 November 2022

Restoration of 25ft Motor Cutter - 8

Progress on the Cutter has been slow, but I have been stripping off very thick paint on the hull's interior above waterline areas and priming with red-lead and then marine primer.


There was a big upheaval caused by the closing of the yard where I'd been working on her that meant I had to find new homes for both boat and a storage container that I purchased off the previous landlords.
The boat was lifted and moved around into the adjacent boatyard where she'd originally been lifted out. The engine was moved separately and put on a pallet alongside the boat. I had previously taken down the lifting gantry and have it stored away at home until required.


Work done since then has been preparation of timber to make new sole boards and their supporting timbers. A few cross beams have been made so far and a pile of selected sapele is now with a friend for planing and thicknessing to 3/4" for making boards.


During the hot summer of 2022 I laid old towels and sacking in the bilges wetted with sea water to limit how much she would dry out and open up.  This was only partially successful, but it did stop any new splitting of planking which was what I'm keen to prevent. I also hung white polytarps over her sides and transom to keep the direct sun off - this is a technique I've used successfully on the Finesse, too.


Planking seams opening up - unsurprisingly

Wet towels

Buckets of seawater ready for use.

Monday 9 August 2021

Restoration of 25ft Motor Cutter - 7

 Although busy in the early part of 2021 getting the Finesse 24 ready for the water I have been working on various jobs on the Cutter when time allows.

Bench assembly of new control panel

A new control panel had to be built for the engine 'from scratch' based on pictures and diagrams in the engine manuals and my own research. A frame was constructed and a sandwich of a sheet of marine plywood and 16 -gauge galv. steel sheet formed the panel. I had been collecting suitable instruments; oil pressure and temperature gauge and ammeter joined the tachometer that came loose with the engine.  Speed control lever was fitted with link arm and rod to connect with governor quadrant and a rod and handle made to connect to the oil filter actuator lever.

Control panel mounted to engine

Switch, pushbuttons and warning lamp were fitted and wired for glow plug, starter and dynamo control. A regulator for the dynamo has been hung on the back of the panel.  The dynamo I've found is not 'correct' for this engine as it should have a CAV D45 model with attached regulator and the one I've opted for in the absence of the CAV is a Lucas C45 from a tractor of similar vintage that has a low-enough 'cutting-in' speed.

Engine controls assembly underway.
Rod links governor quadrant with speed control lever.

Overhauled fuel pump and injectors

After carrying out further tests I was not happy with the way the engine starts and runs and elected to have the injectors and pump checked and overhauled. One very big bill later the injectors have been fitted with new nozzles, pressures set and the pump cleaned and calibrated together with the supply of a new pair of injector pipes. The engine is now nearly ready to be lifted into the boat.

Another old skinfitting hole to be plugged

Final part of forefoot fitted

Lifting eye holes plugged and filled

Lifting eye and fish-plate now surplus

Old bolt hole plugged with oak plug epoxied into place

In the boat I had continued plugging various surplus holes in her topsides and decided not to refit the forward lifting plate. This was originally secured by four 5/8" copper bolts that were fitted at odd angles which must have reduced the strength of the keel in this area. I was concerned about making all these fastenings watertight again after the removal and now that the scarf for the keel repair passes through the plane of half of the bolts. So, I have simply glued hardwood plugs into all the old fastening holes and have 'deleted' the lifting eye that will become a paperweight or some such. At the forefoot a final outer piece was glued and screwed on to replace the ragged and damaged timber here.

Seacock refitted in its original location ahead of engine, aft of the centre bulkhead.

I had opened up the original location of the engine intake seacock and made a mounting plate for the thing and bolted it back in place.  When the outside of the hull has been filled and faired I have a new bronze strainer/scoop to fit over the intake.

Damp towels deployed in below waterline areas inboard

White tarps to keep sun off

We had a brief heatwave late in July and damp towels and sacks were deployed together with the white tarps hung over the sides to protect the hull from direct sun. She has opened up a bit but I am trying to limit this as much as possible in the below waterline areas. I'm not keen on spraying fresh water around in a boat but this is treated tap water and it is not allowed to lie for long. From previous experience; if a clinker hull dries too much the strakes get tensioned across their width which encourages splitting along the lines of fastenings.

Remains of a Cutter

Just part of a keel with bits of hog and garboard

Iron lifting eye still attached

We had been told about the existence of another Motor Cutter on the Haven and on a recent walk we found it... just the remains of it... only part of the keel with a lifting eye (iron) still attached. This boat appears to have been burnt when her usefulness was over. There is not enough left of this boat even for me to attempt to restore....


Sunday 31 January 2021

Restoration of 25ft Motor Cutter - 6

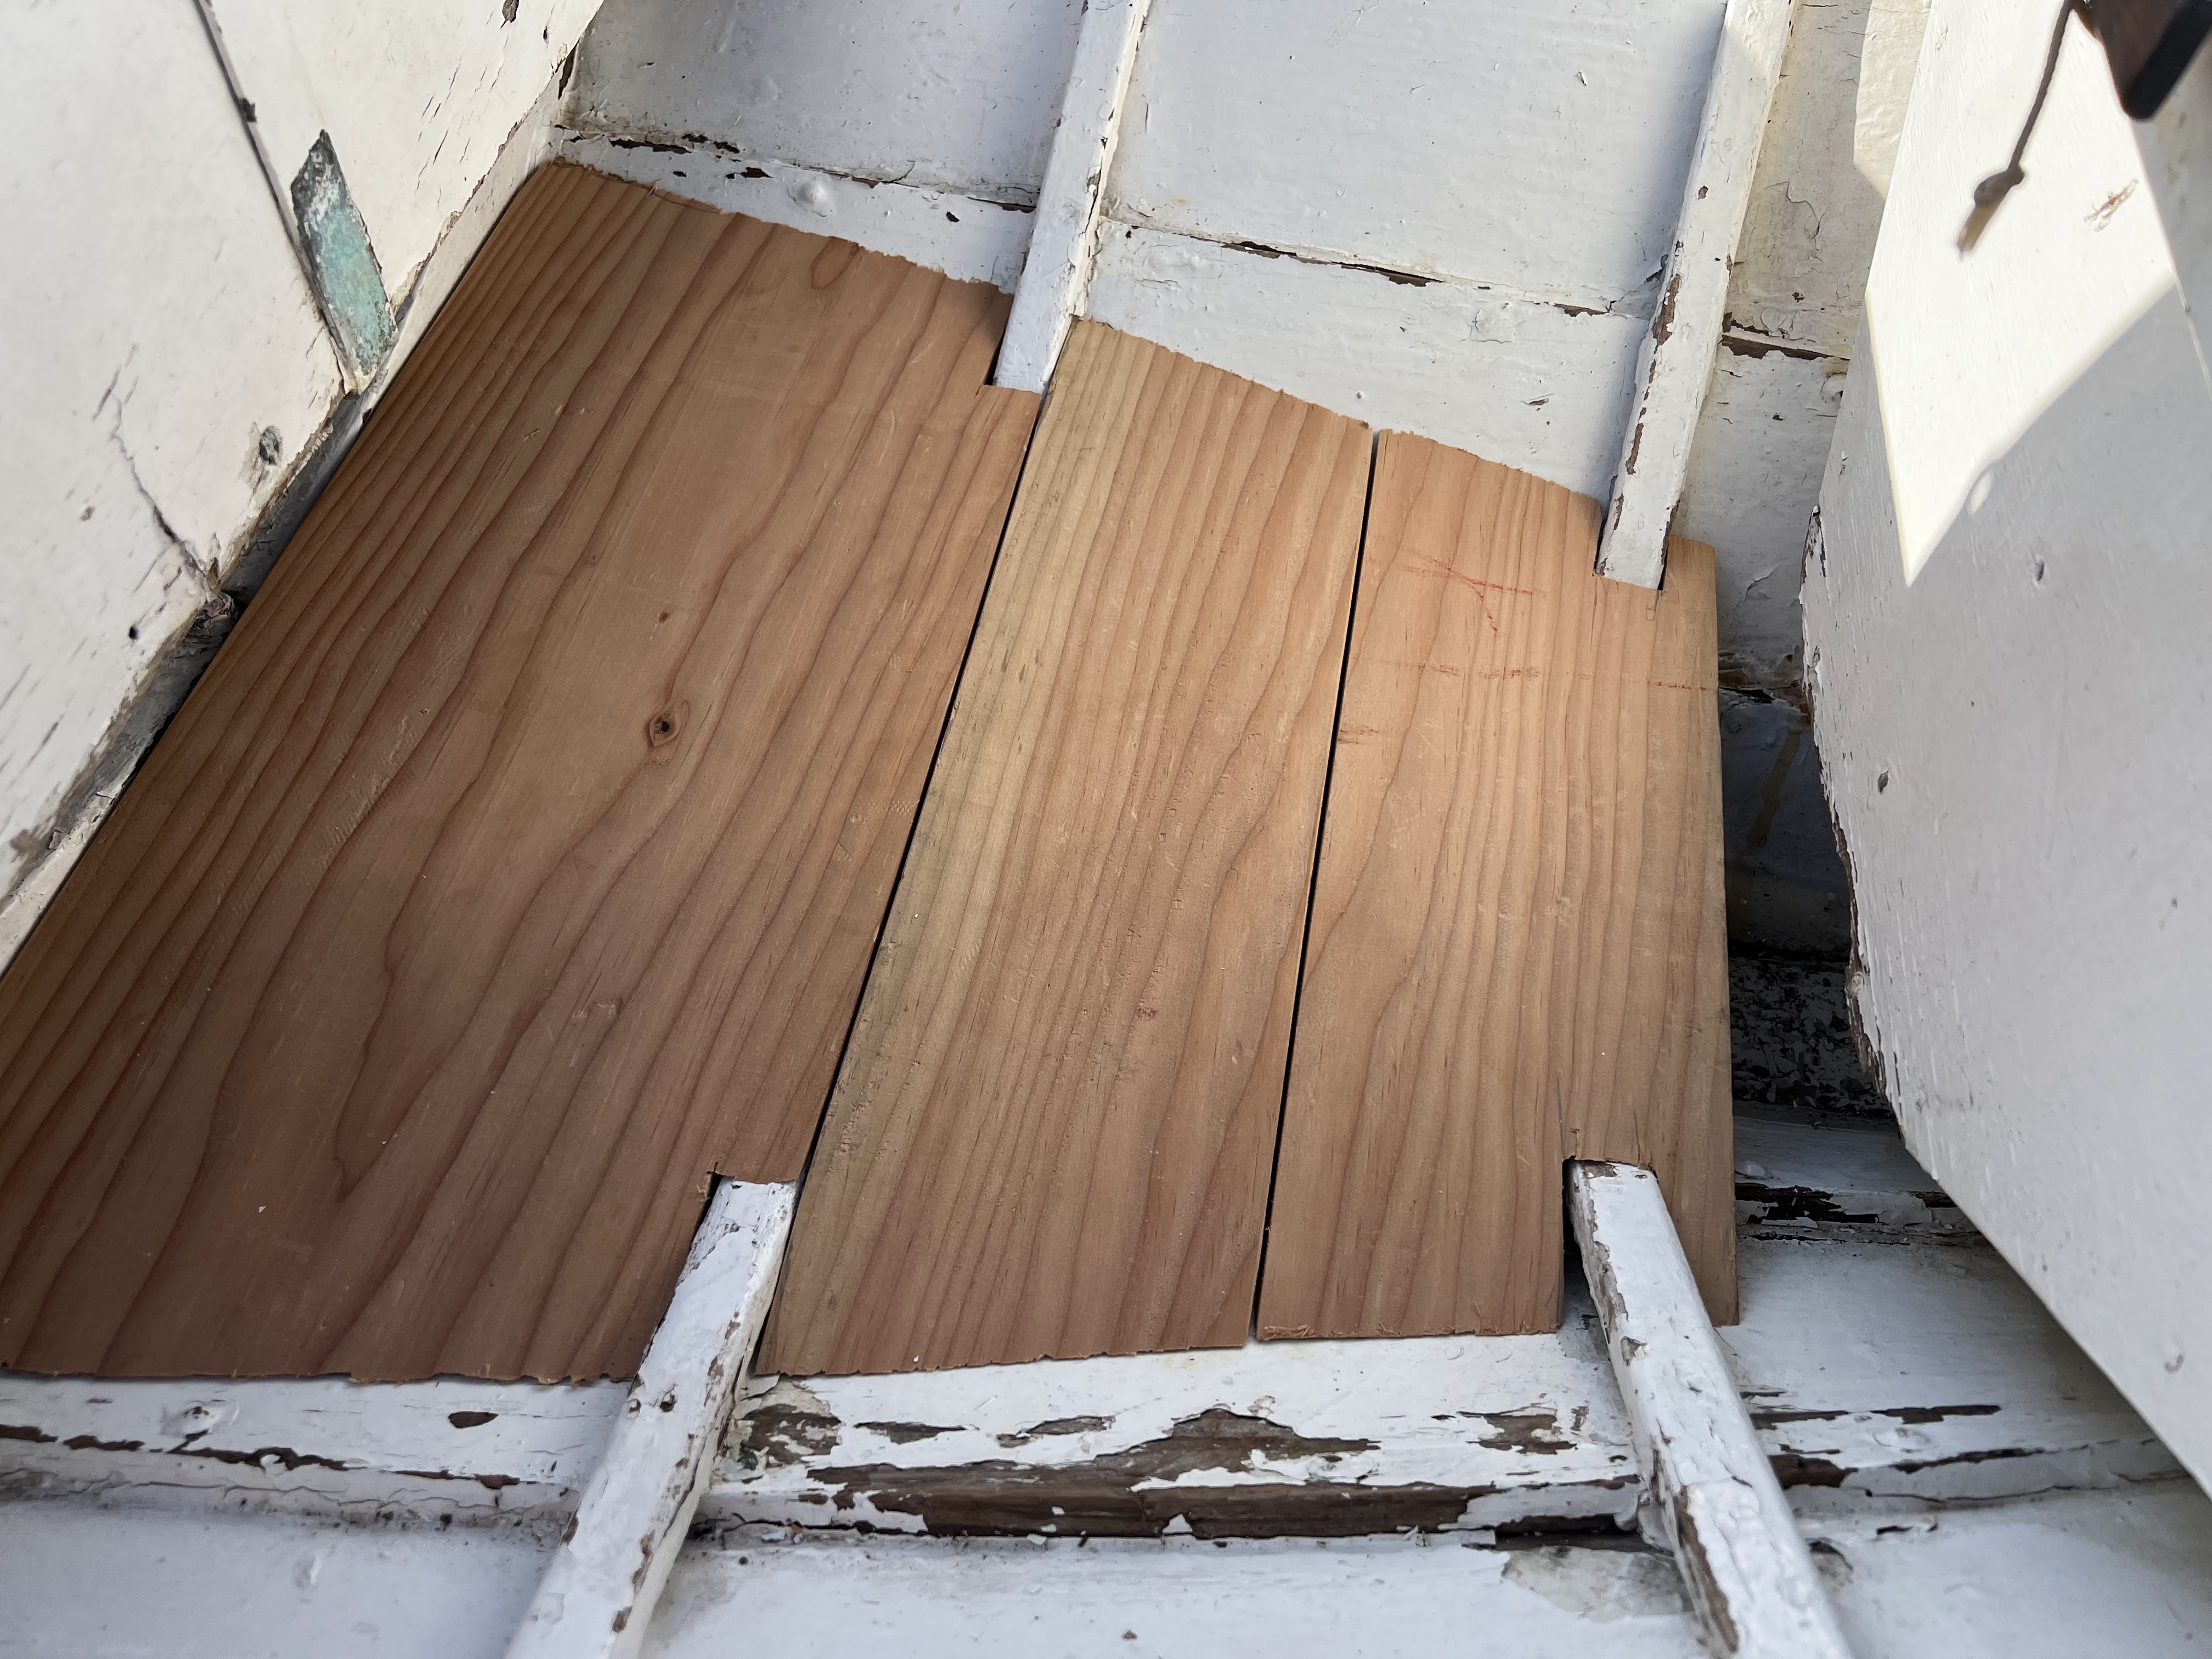
 Following on from the previous post where we made a small repair section for the forward end of the keel and cut scarfs to fit now we fit it into place....

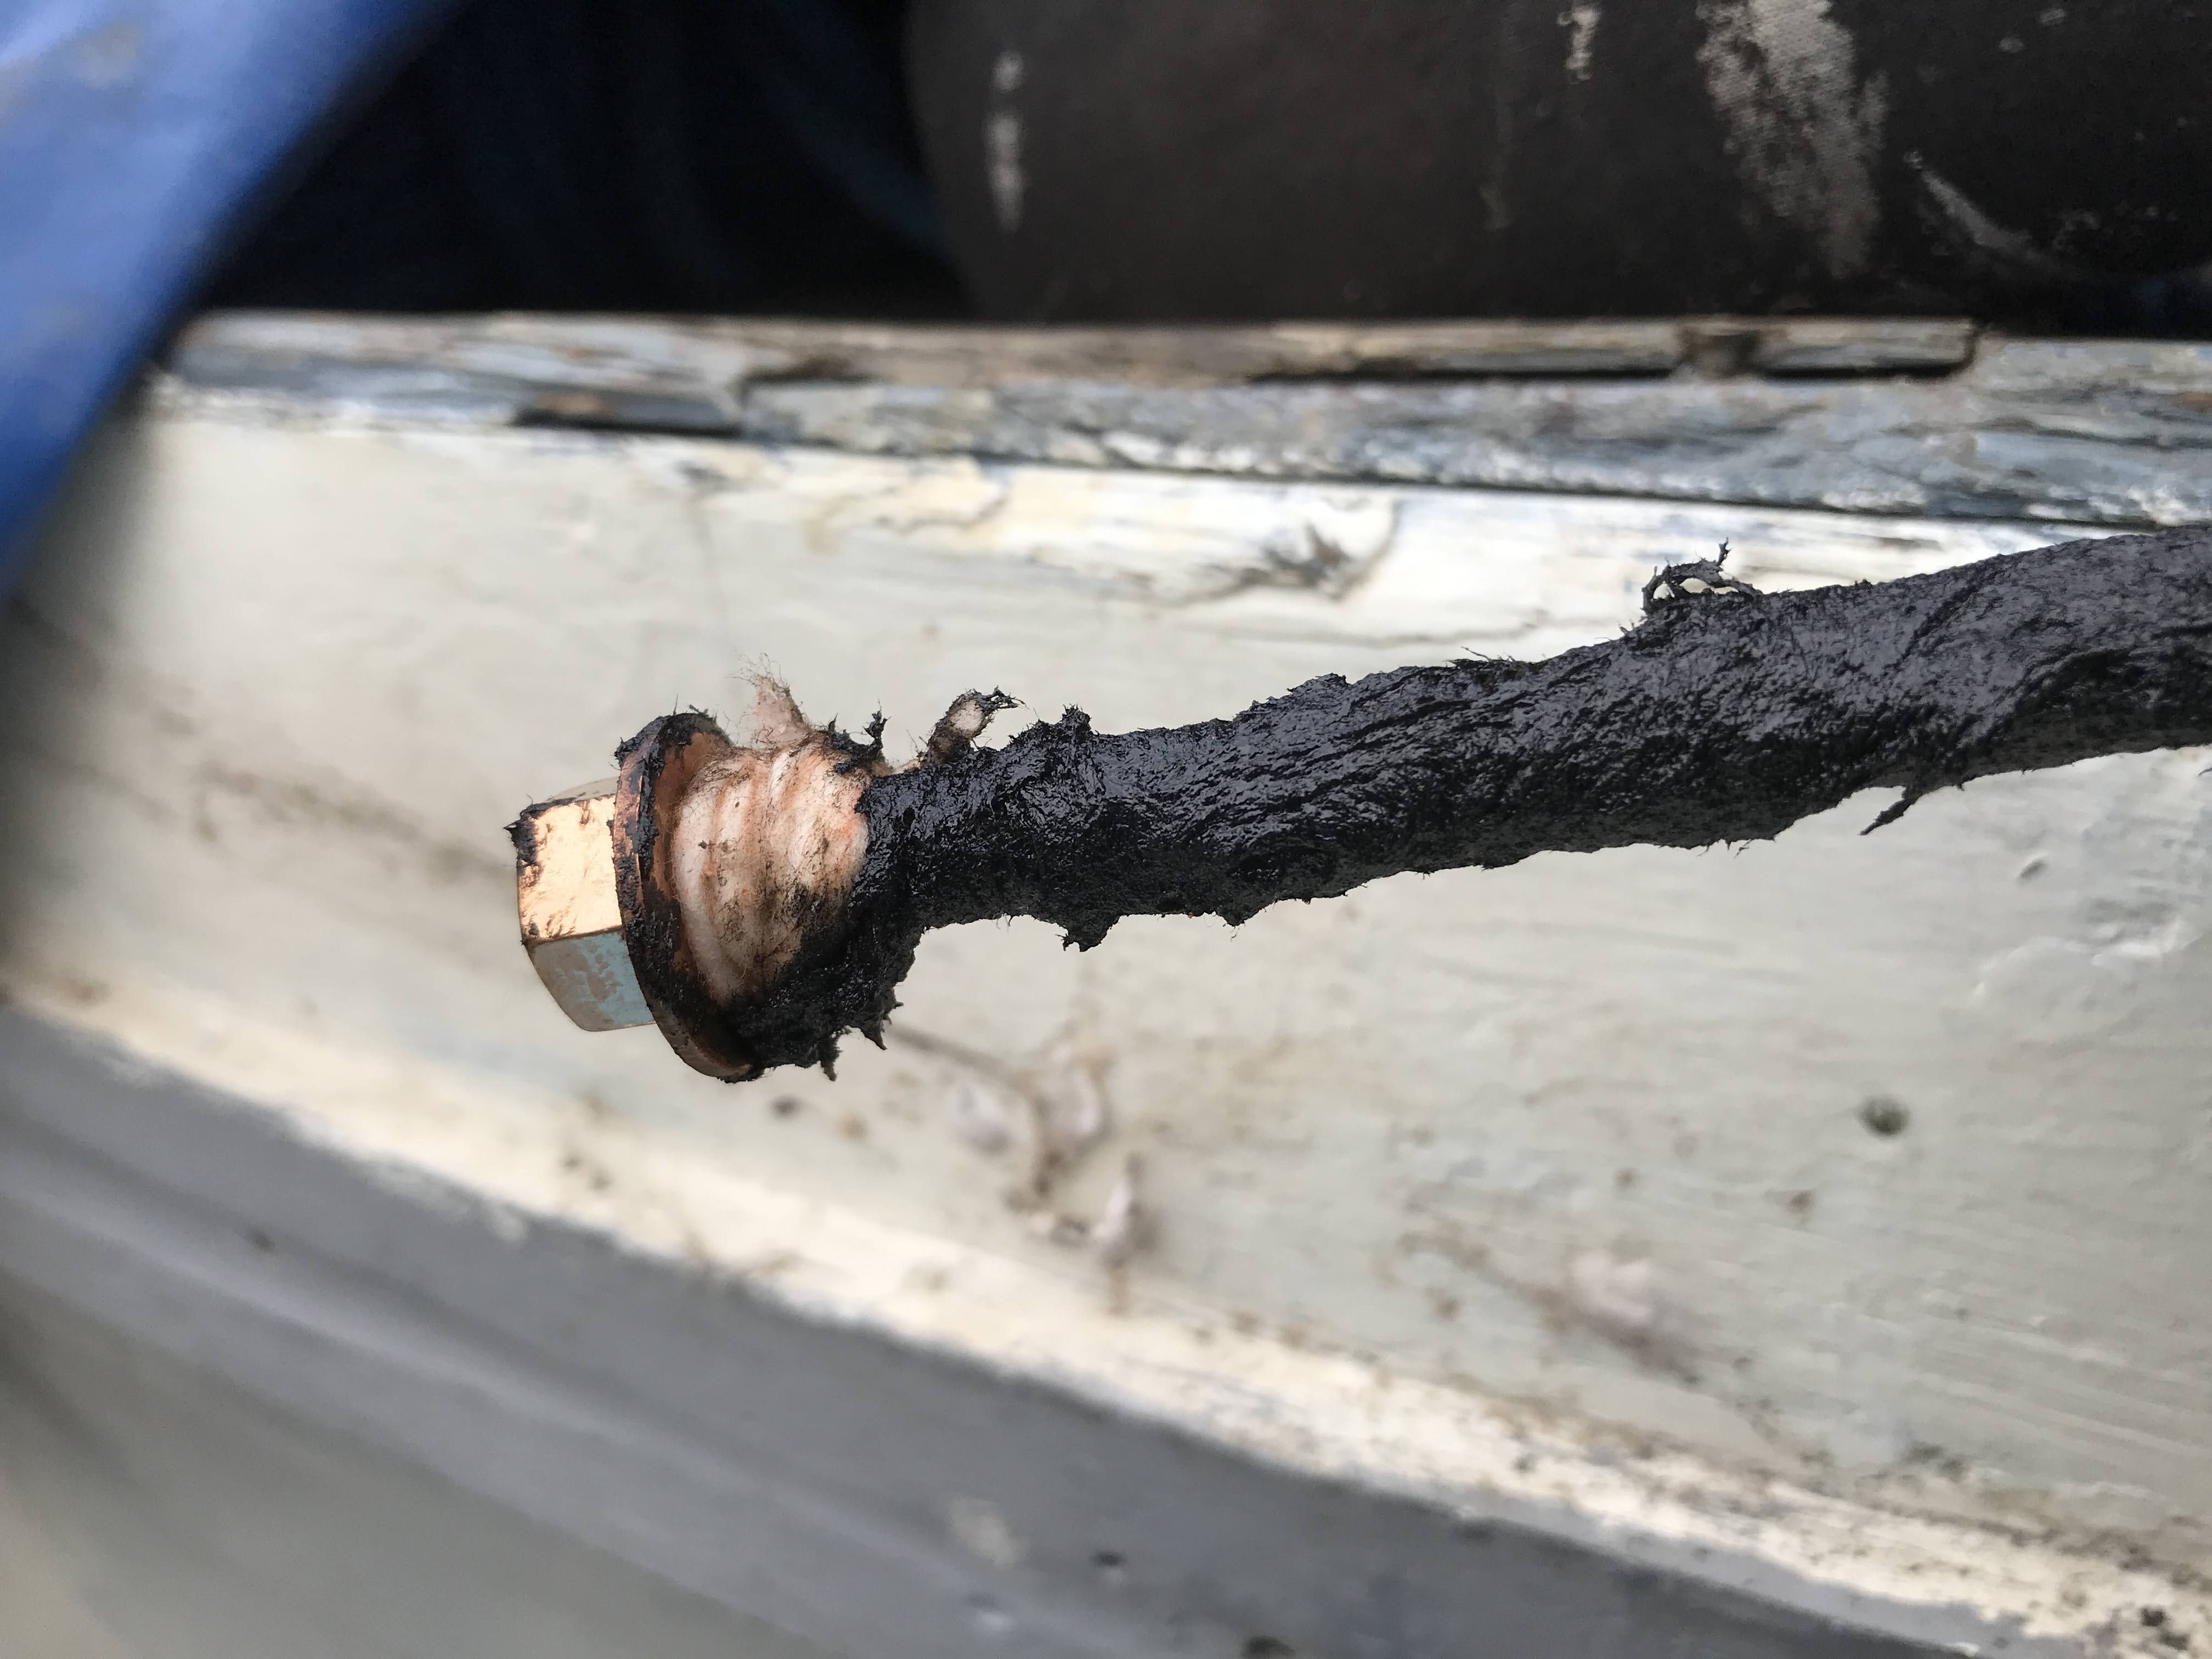
With the section in place holes were drilled for the new bolts and 3/8" bronze threaded rod used to make them. The existing bolt holes through the fore deadwood and hog were re-used 

Bedding compound was made up in the traditional manner by mixing red-lead with linseed oil putty thinned with raw linseed oil.

The bolts were sealed by smearing them with bitumastic compound and a cotton grommet and everything was bolted-up tight.

Ingredients for making re-lead putty

Red-lead putty mixed and ready

New section of keel being offered-up

Bronze bolts sealed with bitumastic and cotton

Bolted up tight

There was a smaller section of timber right on the curve of the forefoot that was crumbling from being encased in the iron 'shoe'. This again was a later addition and presumably a repair after past damage.

With the old bit of timber chipped away the remains of the fixing screws were extracted and the remaining timber cleaned-up. A new piece was cut from the remaining oak and once a snug fit was achieved the mating surfaces were primed with sealing epoxy.
Forefoot having a clean-up for a new piece of timber to be fitted

At this stage in our works the weather got colder and wetter and the virus pandemic halted our works.

I have continued with some small jobs such as priming and varnishing bare wood inside the boat and doing some jobs on the engine.
Varnishing - 3-coats for now to seal and protect the new timber


The Dorman engine is missing its dynamo and instead the drive shaft - which is an extension of the governor shaft - had been fitted with a 'V' belt pulley but no clue as to what it drove. Looking at the engine's drawings it appears that this shaft runs in plain bearings that are splash-lubricated inside the gearcase; hence this shaft is not really suitable for a radial load that a 'V' belt drive would apply. Originally a C.A.V. dynamo was coupled to this shaft and directly driven.
I have been hunting for the 'correct' D45R dynamo for a while without success but then realised that the '45' means a 4 1/2" body diameter and instead a Lucas type C45 dynamo would fit and would have a low enough 'cutting-in' speed. To check this before splashing out on a suitable machine I made a cardboard mock-up to check for fit on the engine - which it does.

Cardboard mock-up Lucas C45 dynamo to check for fit. The oil pressure gauge is temporary.

Now I have obtained an enclosed (i.e. non-ventilated) C45 dynamo with a 1955 date that was probably from a tractor. To fit it to the engine I have to make some clamping straps and a coupling hub as the drive is basically a short piece of 1 3/4" rubber hose secured by hose clips. The drive hub is on order as it has to be made specially and I've no access to a metalwork lathe.

This pulley had been fitted to the drive hub

Pulley removed to leave the 1 3/4" spigot - this turns at 1.4 times engine speed


The engine is also missing its 'dashboard'/control panel on which controls and instruments are mounted. I have a tachometer and have obtained throttle control lever, oil pressure gauge, ammeter and various buttons and switches and the current job is the manufacture of the mounting board, roughly copying the illustrations and drawings in the engine manual. I have made a frame from 1" angle to support a panel and this is as far as I've got now.

This is what it should look like

Control panel manufacture underway

Just before Christmas 2020 a timber supplier I occasionally order from was offering 1m3 bundles of sapele offcuts. I purchased one and a whole stack turned up so now we've got sufficient timber for pretty much all the internal joinery and also the framing for the cuddy and cabin top.

Plenty of sapele - most of these are more than 4m long.