Sunday, 3 May 2020

Restoration of 25ft Motor Cutter - 1

An initial assessment of the boat showed that she had fractured timbers (ribs) along both sides roughly at the turn of the bilge where the heavy floor timbers end. These are 3/4” by 1” with a radiused inner face. The timber appears to be Canadian Rock Elm but unavailability of this meant that I sought some unseasoned English Oak and a source of this was found nearby.
Radiusing the new frames

The oak boards were sawn down, planed and had the radius routered on.  They needed about forty minutes in the steamer before being bent in. We clamped and wedged the replacement frames alongside their broken originals and left them until the following weekend.
New frames temporarily clamped into place

A section of each broken frame was marked and fastenings cut off and driven-out before the section was cut away using the 'multi-tool' and a scarf made on the remainder.  Each new frame was scarfed to fit. Then when ready the scarfs were glued and the frames re-fastened using the original nail holes. As she is planked in hard wood I kept to the original 10-gauge nail.

Marking a frame for cutting

'Multi-tool' was a great help in the confined space
Checking new frame section for scarf fit.
Scarfs glued and re-fastened
Whilst this work was going on I was also stripping the paint off her bottom. A filthy horrible job since she had been tarred to preserve her by a previous owner. Badly neglected there must have been some areas that had been bare for a while and there is abrasion and barnacle marking here and there. Stripping also revealed that she has had planking repairs carried out in the past; starboard side amidships; port quarter and by her stem on starboard side.
Stripping her bottom paint
We also started plugging some of the holes left by removed skin fittings - and there are several all over the hull.  Here my buddy is filling up where a massive exhaust outlet was once installed in her transom. Left over from a now-removed engine.

Plugging holes with glued iroko
I have been fortunate in being able to obtain an original engine for the boat of Dorman-Ricardo type 2DSM that this boat almost certainly was fitted with when originally built (plus another spare one!). Here is a page from the engine manual showing the installation in a 25ft Cutter:
Dorman 2DSM installation drawing from the engine manual

Monday, 2 December 2019

New Project: 25ft Motor Cutter

After a busy summer of sailing and boating during which I have refurbished a plywood Miracle sailing dinghy for my grandsons to sail, I have made a start on a pending project in the shape of an ex-Admiralty 25ft Motor Cutter:-
Cutter on mooring - cover removed. The spar is the ridge pole.

She has remained tight and floats on high tides

A nice-looking work boat.

She had been on a lay-up mooring with a tarpaulin over her to keep the weather out. On a recent high tide she was floated off and towed to a local boatyard and lifted out.  Now chocked-up in the yard work can commence.
Towed to the boatyard..

..waiting for the boatyard hoist.

First jobs are to strip the paint and tar from her bottom to assess the condition of her planking and to get some timber and fastenings on order to replace a few of her broken timbers.


Some of the bottom planking looks a bit tired, worn plank-edges.


She is currently engineless so I will concentrate on interior repairs and painting. There is a lot to do and I would like to source some hardwood to make new thwarts, side benches, lockers and engine casing.

Delivered to the yard for me to work on her.

Thursday, 18 April 2019

Redwing refit continued

Work continues on 'Pintail'... After a lot of rubbing down and a good clean out her interior was given two coats of varnish.  She has now been turned over and placed on trestles so her bottom could be cleaned and rubbed-down for fresh varnish.
There are a couple of spots where fastenings have been corroding that have been cleaned up and treated before being primed with thinned varnish.  A good rubbing-down with wet-or-dry 400 grade used wet on the topside and 320 grit used dry on her bottom and she was ready for varnish. Two coats applied coat-on-coat with a day between coats.

Staining caused by corroding fastenings and keel band
Flatting down
Varnish applied


Tuesday, 12 March 2019

Redwing refit

'Pintail' our National Redwing dinghy is thirty years old this year and in preparation to celebrate her birthday she's getting a re-varnish and spruce-up this spring.

All the interior gear, floor-boards, buoyancy bags and fittings have been stripped off and the hull given a good wash and scrub inside and out...

.. Followed by the labourious task of flatting back the varnish. For this I'm using 180 grit paper.  It's a bit coarse for varnish re-finishing normally but on the fiddly and rather rough bits that are normally out of sight I feel that getting a good 'key' for the new coats is preferable to use a coarser grade.  They say that varnishing is 90% preparation, 10% application; how true that is.

That's all just for now; got to get on with rubbing down...

Wednesday, 1 August 2018

Making a mast and painting

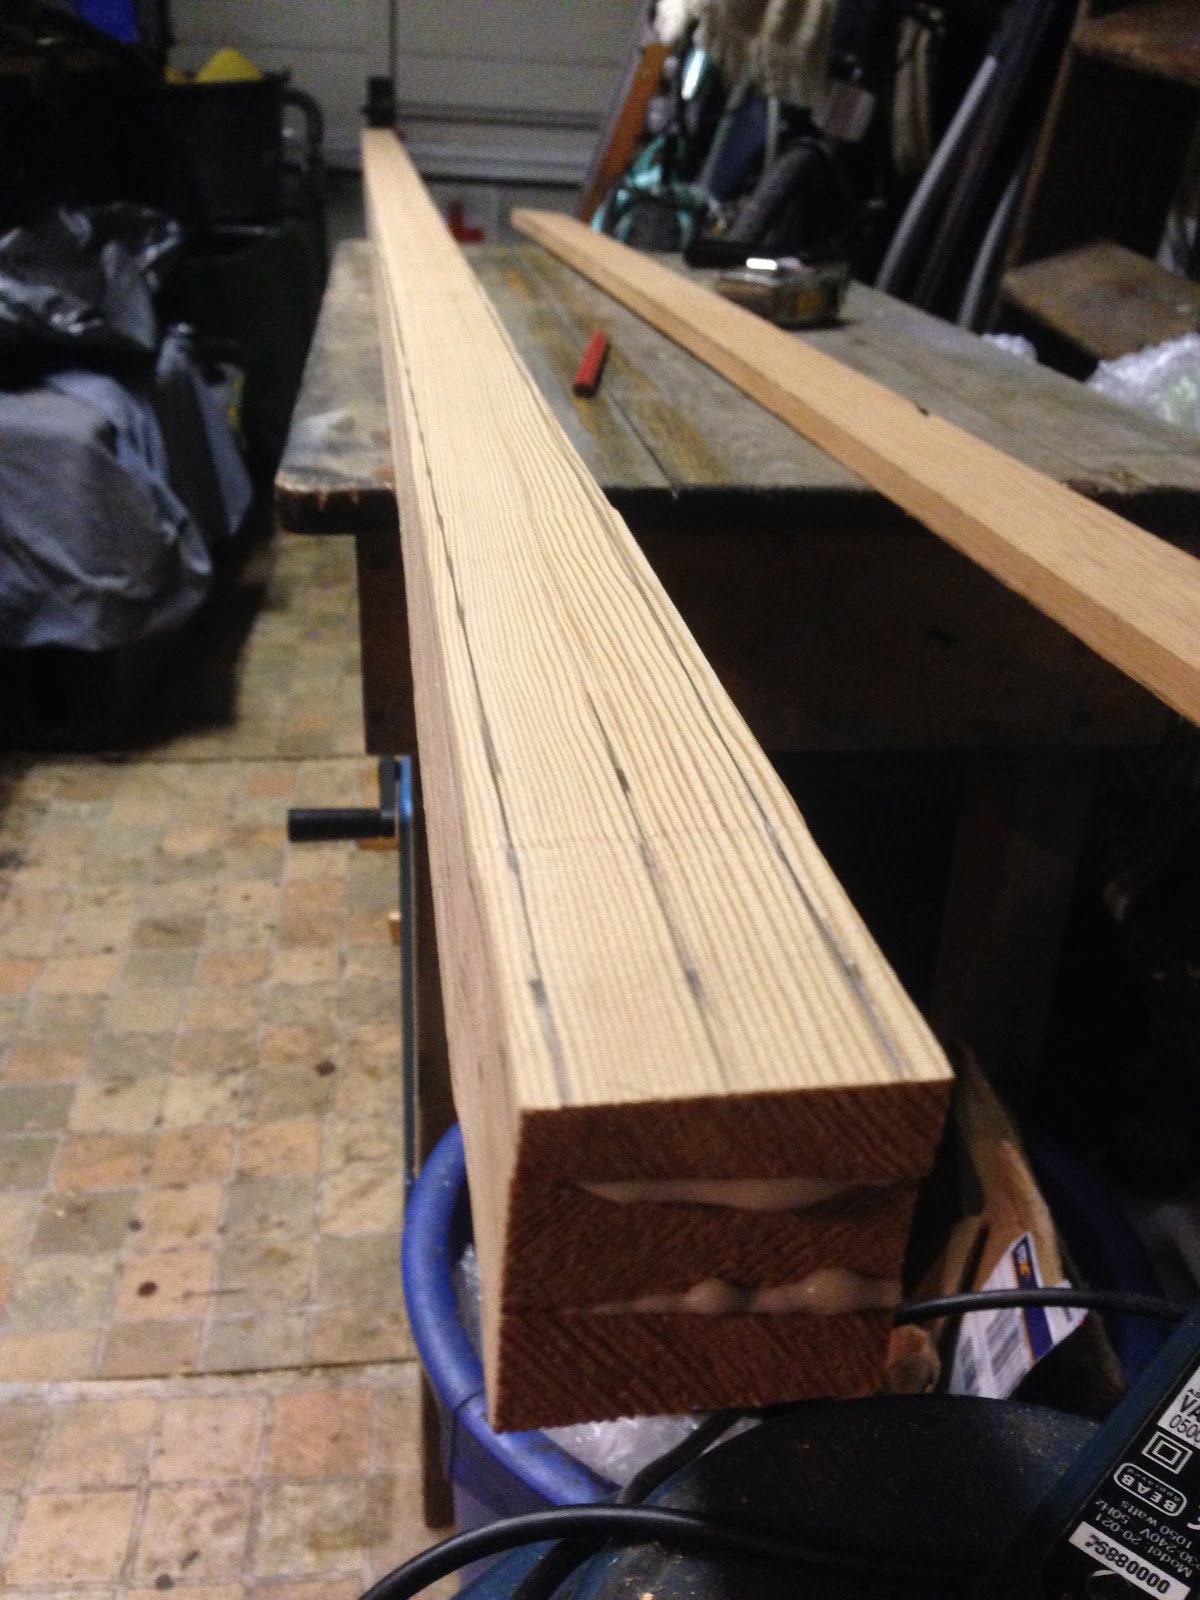
I had a small but heavy spruce mast and spars from an old balance-lug from which the sail had long rotted-away. However, she needed a mizzen-mast of about 9' long and I decided to have a go at making one. I had a couple of 18' lengths of 3/4" by 1 3/4" douglas fir left over from the repairs to the boat and these were cut down and glued together.
Three lengths of fir glued together
Taper marked
These were planed square and then marked with a taper..

Planed clean


The mast taper was planed on with the spar still square.

Taper planed
A spar gauge was made up to mark the spar for planing and it then becomes eight-sided.

Spar gauge - two pencils and guide pegs
Marking the spar
Corners planed off to the marks - now its eight-sided
The faces were then numbered 1-3-5-7-9-11-13-15 with odd numbers only. This was done to avoid missing one corner whilst turning the eight-sided spar to sixteen..

Numbered faces
Spar planed along its length till it became sixteen-sided. Then re-numbered...

Numbered faces 1-16

Planed again on every corner till it is now at least 32-sided...

Nearly round
Finally a good deal of sandpapering with a coarse grade produced a smooth, round spar.

Finished spar
Well, not quite; it required the head to be rounded and a sheave cut and a taper and heel cut to suit the step and it was given a few coats of Danish Oil.

Now with the boat in the shed I was able to get on and finally paint her. All the new wood was sanded and primed and a couple of coats of white undercoat applied to the above-floor areas followed by a coat of white gloss. The bilges had previously been painted with grey 'Danboline'.
Seats and thwarts had a coat or two of 'woodskin' over the previous coats of 'Sikkens' - I'm trying this in place of varnish - not so glossy but might be easier to maintain.
The topsides were undercoated and painted with a gloss and the bottom painted red. There was no waterline marked on the boat and I spent a whole day with a tight string, level, square and rule transferring a line to the sides of the boat based on where I think she was floating.

Undercoating
Clean glossy white
Thwarts and brightwork treated with 'Woodskin'.
Topsides having two coats
Rubbing strip picked-out in red
Bottom painted - two coats
Finally she's finished and rolled out of the shed..


Floor-boards were given a coat of some non-skid grey


Final jobs are to complete a rudder, step the masts and make some sails...

Friday, 10 November 2017

Fitting lodging knees

The small rig that is planned for Nanw uses an 11ft long unstayed mast and as mentioned below it seemed a good idea to put some more strength into the fore part of the boat. To do this I have made some lodging knees to brace the forward thwart to the sides of the boat.
After being shaped round these were glued and screwed with 14G x 4" screws to the thwart which is 1 1/8" thick and nail and rove fastened through the adjacent frames.
Forward thwart braced with lodging knees

Thursday, 2 November 2017

Fitting a mast step and making knees

I have a plan to fit Nanw with a simple standing lugsail and mizzen.  I have a set of ancient spars that were possibly from a boat my father had as boy in Devon. Dad is 87 now so it gives an idea of their age! The mast is spruce and has a gentle taper as have the boom and yard.
The mast needs to be unstayed so I needed to build some more strength into the forward thwart and make a step for the mast.
First job was to make some lodging knees to fit between the hull side and the thwart to brace it and stiffen her up. In the absence of proper grown crooks I glued up some iroko with a big half-joint to make a pair of blanks:
Knee 'blank' made for lodging knee - this is the starboard one.
The knees were marked and cut to fit closely into planking and frames and will be through-fastened to the hull and glued and screwed to the thwart.
Making the port lodging knee fit.
Next job was a mast step.  I made a 'floor' to fit closely to the hull just aft of the stem knee and built up some hardwood to form a mast step. This will be screw fastened to the existing structure and glued and nailed together and through-fastened.
Mast step tied to new floor and standing on stem knee and hog.
The forward thwart was bored through using a convenient hole saw and the mast was trial-stepped. After checking it was upright and the rake was okay I have marked the step for the heel mortice.
Trial stepping the mast - position for step mortice located
Nanw's mast stepped at last!